Overview
The system can integrate into the Mitel MiContact Centre Office (MiCCO) Reporter application to provide playback of recordings direct from within the Reporter program. Users are able to search and retrieve calls using the normal Reporter environment and playback the related call directly without having to use the website to perform the search.
When the play icon is clicked the playback window on the website is launched using the users default browser settings. If the user is not already logged into the web site they will be prompted for their Call Recorder username and password. After they have entered these then will be then be redirected to the playback window. If they are using Active Directory integration then they will not be prompted for their credentials.
As the user has to enter their Call Recorder username and password to access the recordings the security settings configured on the system still apply. This prevents circumvention of the security restrictions in place when searching and retrieving recordings using the Reporter.
Licensing
The integration requires the following licensing:
- Xarios MiCCO licensed feature.
- Mitel MiCCO Call Recording Integration license - this is a Mitel license not a Xarios license.
Requirements
The Xarios MiCCO integration component needs to be installed on the MiCCO server and also onto each client computer that has the MiCCO Reporter application installed. The MiCCO server needs to be able to connect to the server that has the database role using TCP port 1433.
Supported Versions
Server Installation
To install the MiCCO integration onto the MiCCO server:
- Before installation on the MiCCO server the MiContact Center Office Server service needs to be stopped. From the MiCCO server right click on the MiCCO Server Monitor icon in the system tray and select Control Panel.
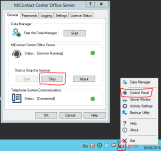
Control Panel
- From the MiContact Center Office section click on the Stop button to stop the service.
- Run the setup_mitelmcsb_mcsb_v<version>.exe setup file provided.
- Follow the instructions and when prompted enter the host name of the call recorder server that has the database role.
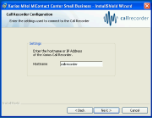
Host name
- Click on Next then follow the instructions until the installation completes.
- To configure the devices that are to be recorded. From the MiCCO server right click on the MiCCO Server Monitor icon in the system tray and select Data Manager.
- From the navigation menu on the left hand side scroll down and select Call Recording.
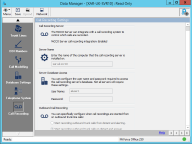
Data Manager
- Enter the host name of the MiCCO server (NOT the call recorder server) in the Server Name section.
- If trunk side recording is being used select Trunk Lines from the navigation on the left hand side.
- If extension recording is being used select Extensions from the navigation on the left hand side.
- Select the device that is to be recorded and click on Change.
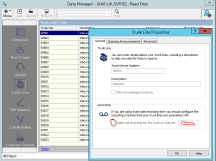
Device Properties
- Check the Enable call recording for this trunk/device on channel.
- Enter a channel number. This can be any value between 1 - 32767 and each device to be recorded needs to have a unique number.
- Create network shares on the MiCCO server called AL_CONTROL and AL_RECORD that use the same folder (c:\al_record).

Create Share
- Set the permissions on the share and the shared folder to read/write for each user that requires access.

Share permissions
- Start the MiContact Center Office Server service as shown in step 1.
Client Installation
To install the call recording integration on each client:
- Follow the steps 1 - 5 as per the server installation.
- Install the MiCCO Reporter application and ensure that the "Reporter Call Recording Integration" option is checked during installation.
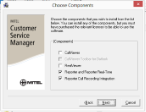
Image Title
Diagnostics
To enable diagnostics:
- Open the config.xml file located in the Xarios MiCCO installation folder.
- Set the DebugMode entry to True.
<RecorderServer>
  <ServerName>XariosRecorder</ServerName>
  <DebugMode>True</DebugMode>
  <MitelServerName></MitelServerName>
  <ShowURL>True</ShowURL>
</RecorderServer>
- Restart the CSM Gateway Service.
- The event.log file will be generated in the same folder.
 |
This setting should be set back to False when any diagnostics have been completed to prevent excessive build up of log file information. |
To enable Mitel MiCCO diagnostics:
- Open the MiCCO Server Control Panel.
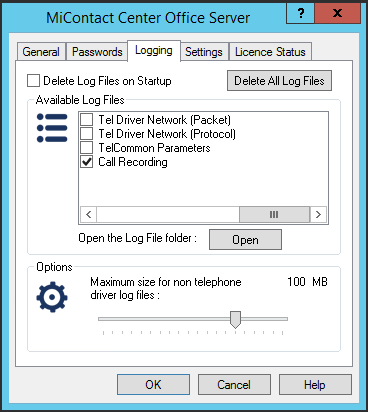
- Select the Logging tab.
- Check the Call Recording option.
- Select the General tab.
- Restart the MiContact Center Office Server Service by clicking the Start and Stop buttons.
- There will be a CallRecording.log file generated in <MiCCOInstallFolder>\Server\LogFiles.
Troubleshooting
Issue: MiCCO CallRecording.Log shows "Failed to connect to Recording Server"
Cause: The integration has not been registered on the server or this has been removed.
Resolution: From the command line run "regsvr32 <installtoXarios Mitel MiCCO>\Xarios.MMCSB.ocx", then restart the MiContact Center Office Service.


